Multi-Select
The Multi-Select tool helps you save time by applying grouped actions to multiple objects in your project. It is especially useful for moving, duplicating, rotating, reorganizing, or deleting multiple elements at once.
Overview
The Multi-Select tool allows you to select several objects (furniture, walls, windows, annotations, etc.) in one single action. It is accessible from the toolbar at the top of the screen.
How to use the tool
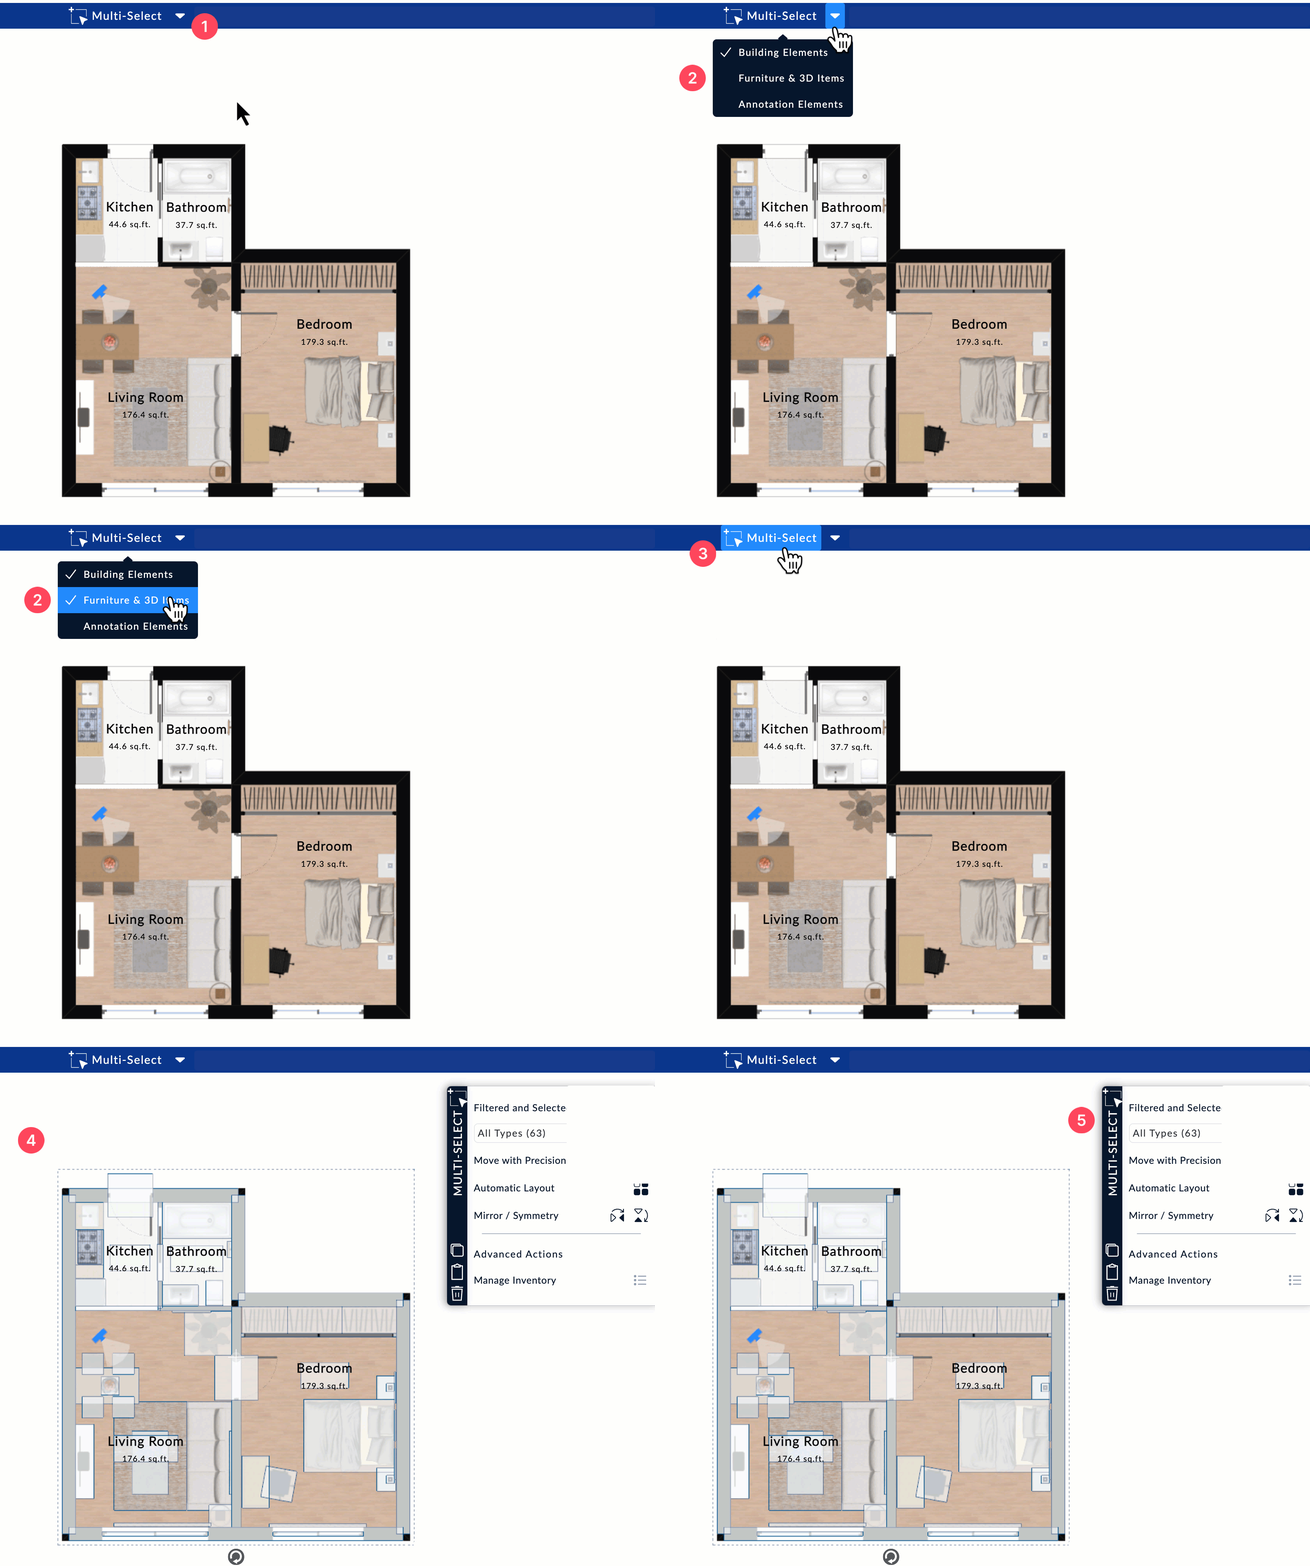
- Click the arrow icon in the toolbar to open the dropdown menu and reveal the options.
- Select the objects you want to include in your selection.
- Click on Multi-Select to activate the tool.
- Select the desired objects by click-dragging to draw a selection box around them. Once several objects are selected, a dotted outline will appear around the group.
- The Multi-Select Properties Panel opens automatically on the right, offering grouped editing tools.

You can also select multiple elements in your project by holding down the Shift key while clicking on several objects.
Multi-Select Properties Panel
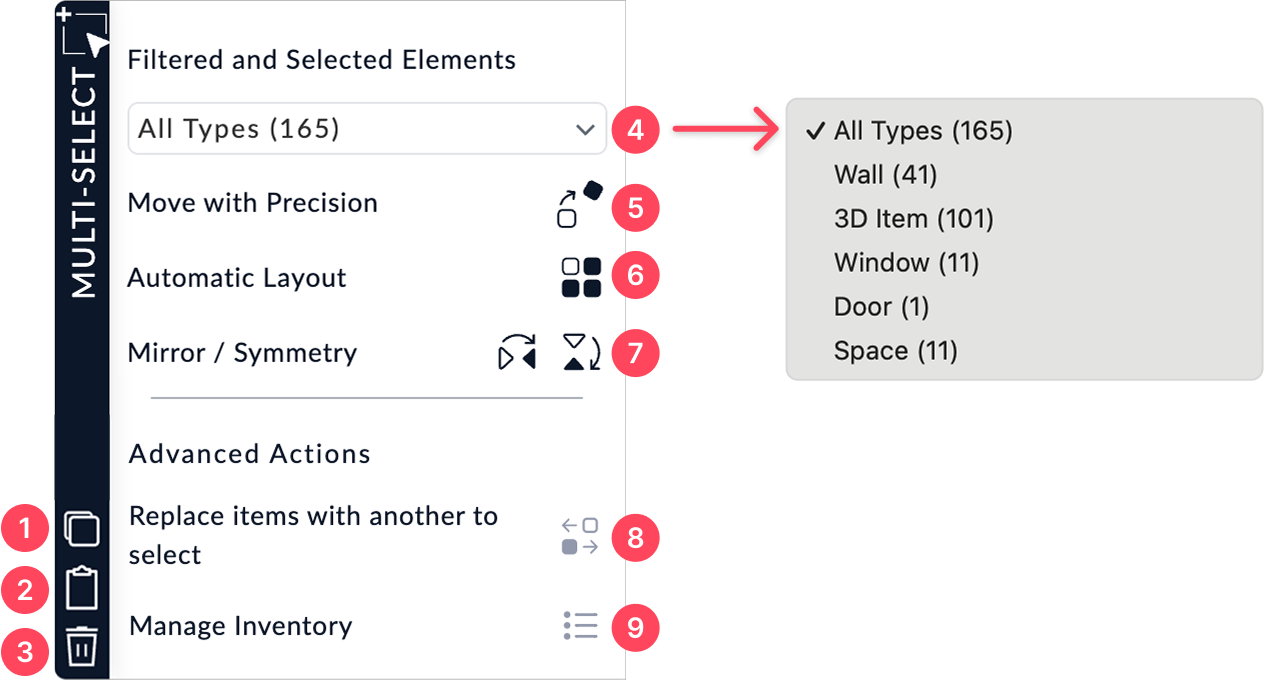
The properties panel displays different options depending on the selected objects. Below is a detailed overview of the available functions:

1. Duplicate
Creates a copy of the selected group and automatically places it next to the original.
2. Copy to Clipboard
The clipboard can be used to copy and paste elements from one project to another.
- To copy elements: use the button, or
Ctrl+C(Windows) /⌘+C(Mac) - To paste elements:
Ctrl+V(Windows) /⌘+V(Mac)
3. Delete
Deletes all selected objects from the project.
4. Filter by Object Type
This dropdown menu lets you refine the selection based on object type:
- All Types : all selected objects
- Wall, 3D Item, Window, Door, Space, etc. : allows you to act on a specific type of object
Use this option to modify only certain elements within a broad selection (e.g. only furniture, without affecting walls).
5. Move with Precision
Allows you to move selected objects using advanced settings:
- Direction (X, Y)
- Elevation
- Rotation
Ideal for placing your objects precisely or respecting specific distance constraints.
6. Automatic Layout
Multiplies and reorganizes selected objects based on predefined layout schemes.
Useful for quickly arranging groups of chairs, light fixtures, or similar objects.
7. Mirror / Symmetry
Lets you flip objects:
- Horizontally (left ↔ right)
- Vertically (top ↔ bottom)
Handy for creating symmetrical layouts or reversing furniture orientation without repositioning manually.
You can also mirror an entire project with this function.
8. Remplace with an Existing Object
This option allows you to replace selected items with another object already present in the project:
- Select the object to replace and activate the function by clicking on its icon
- Click the replacement object (red crosshair cursor)
- Each selected object will be replaced by the chosen item
Make sure replacements are consistent (e.g. replacing all chairs of the same type).
9. Manage Inventory
A useful tool for tracking the furniture used in a project:
- Reset the inventory
- Add items to the inventory
- Remove items from the inventory
Helpful for creating a furniture list or preparing a quote.