Background Plans
Import an existing plan as a background to help you trace walls, doors, windows, and arrange the space more easily. You can calibrate the scale to ensure that the dimensions match real-world measurements.
Import a Plan
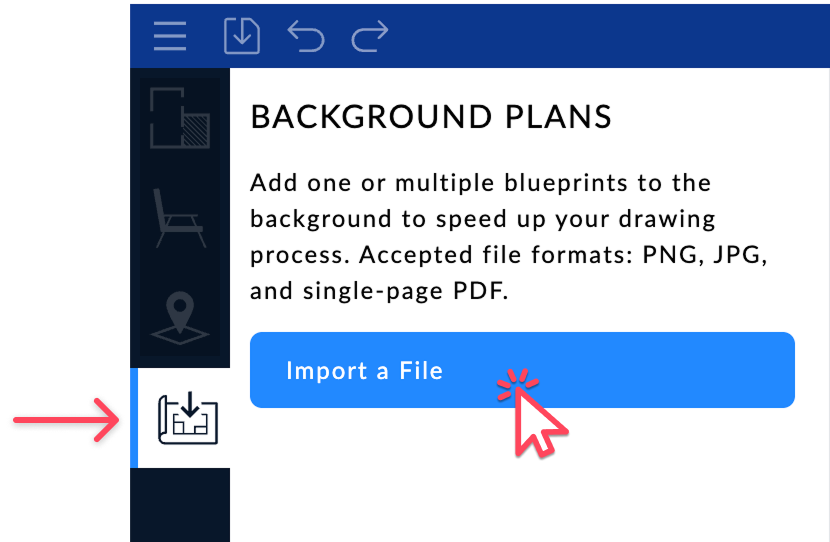
- Click the Background Plans icon in the side panel.
- Select your file in one of the following formats: JPG, PNG or PDF (single page only).
- The imported file will immediately appear as a background on the active level.
If your project has multiple levels, you can import a different plan for each level. It's also possible to add several background plans to the same level if needed.
PDF files are treated as images. For best performance, we recommend using lightweight files or exporting the PDF as an image (JPG/PNG).
Scale the Plan
Once the file is selected, the Plan Scaling window opens automatically.
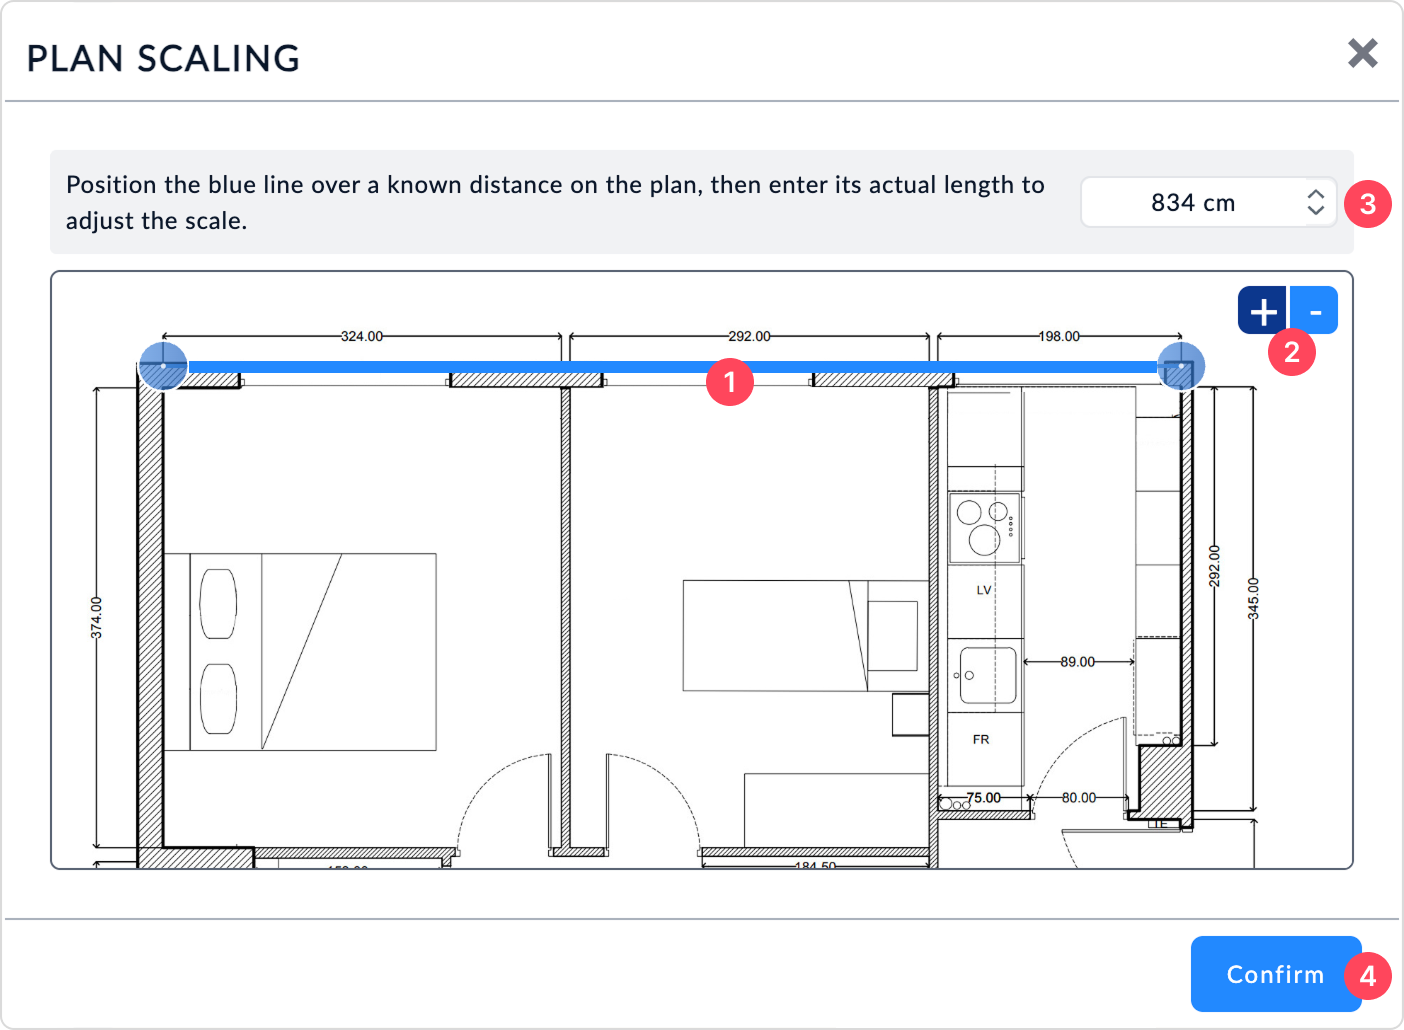
Follow these steps to adjust the scale of the background plan to match real-world dimensions:
1. Place the blue line on a known large distance from the plan (wall, facade, etc.) using the two circular handles at each end. 👉 The longer the distance, the more accurate the calibration will be.
2. Zoom in to position the ends of the line precisely, using the + / – buttons or your mouse scroll wheel.
By default, handles snap horizontally or vertically. Hold down Shift, Ctrl or ⌘ Cmd to temporarily disable snapping while positioning.
3. Enter the real distance in the input field. The units used depend on your project settings: metric or imperial system, and the selected measurement unit (m, cm, mm, in, ft, etc.).
4. Click on Confirm to apply the scale.
The plan is then automatically added to your project at the correct scale.
You can readjust the scale at any time by reopening the Background Plans panel. No need to re-import the file.
Manage the position, visibility, and display options
Once the plan has been imported and scaled, you can adjust its visibility, position, display level, and appearance. The goal is to make tracing in 2D easier while staying in full control of how the background plan is displayed.
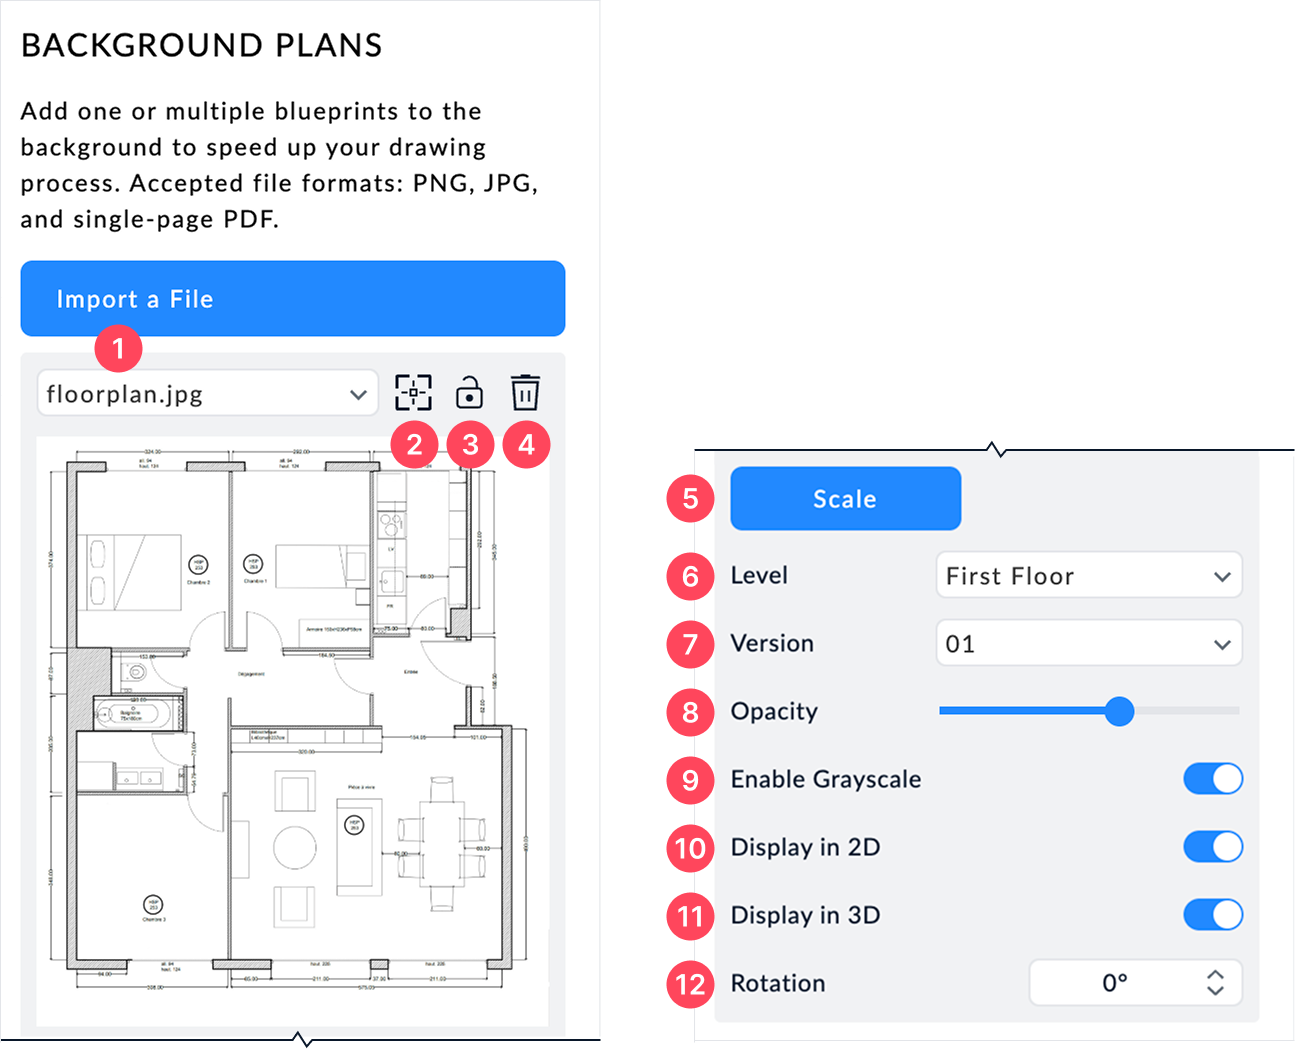
1. Switch background plan
If you have imported multiple plans, select one using the dropdown menu. This lets you assign each file to a different level (floor, basement, etc.).
2. Locate the plan on the canvas
Click to center the plan in the 2D view.
3. Lock/Unlock
Lock the plan to avoid moving it while drawing.
4. Delete the plan
Click the trash icon to remove the selected file.
5. Rescale the plan
Click the Scale button to reopen the Plan Scaling window.
6. Set the display level
Choose which level the plan will appear on in your project (e.g. ground floor, first floor).
7. Manage versions
Select a version of the plan if you have imported several variations.
8. Adjust opacity
Make the plan more or less transparent to avoid obstructing your drawing.
9. Enable grayscale
Toggle grayscale mode to neutralize the background visually.
10. Display in 2D
Toggle to show or hide the plan in the 2D drawing area. Turn this off to hide the plan when you no longer need it for tracing.
11. Display in 3D
Toggle to show or hide the plan in the 3D views. Use this to control whether the background plan appears in your 3D renderings.
12. Rotate the plan
Adjust the plan’s orientation if it's not aligned correctly.
Draw from the background plan
Once your background plan is correctly positioned:
- Lock it to avoid accidentally moving it while drawing.
- Use the Walls tool to trace exterior and interior walls along the plan.
- Adjust the opacity if the plan obstructs your design.
- Add Doors and Windows as needed.
- Hide the plan once tracing is complete to keep your workspace clean. To hide the plan, turn off the Display in 2D toggle (option 10) in the plan settings panel. You can also turn off Display in 3D (option 11) if you don't want the plan to appear in 3D views.
Use the Locate function to re-center the plan at any time, and the Version function to test different variants (sketch, final version, etc.).
Related articles
Continue learning with key tools that complement background plans:
- Draw walls and rooms ↗
Learn how to draw exterior and interior walls based on your background plan. - Add Levels, Stairwells and Mezzanines ↗
Assign different background plans to each floor for multi-level projects.