Add Levels, Stairwells and Mezzanines
To design a project with multiple levels, split levels, or open spaces, you can add floors, basements, floor openings, or mezzanines.
This section guides you step by step to create and organize these levels in your project, so you can accurately represent its architectural structure.
1. Add a Level
To add a floor or a basement:
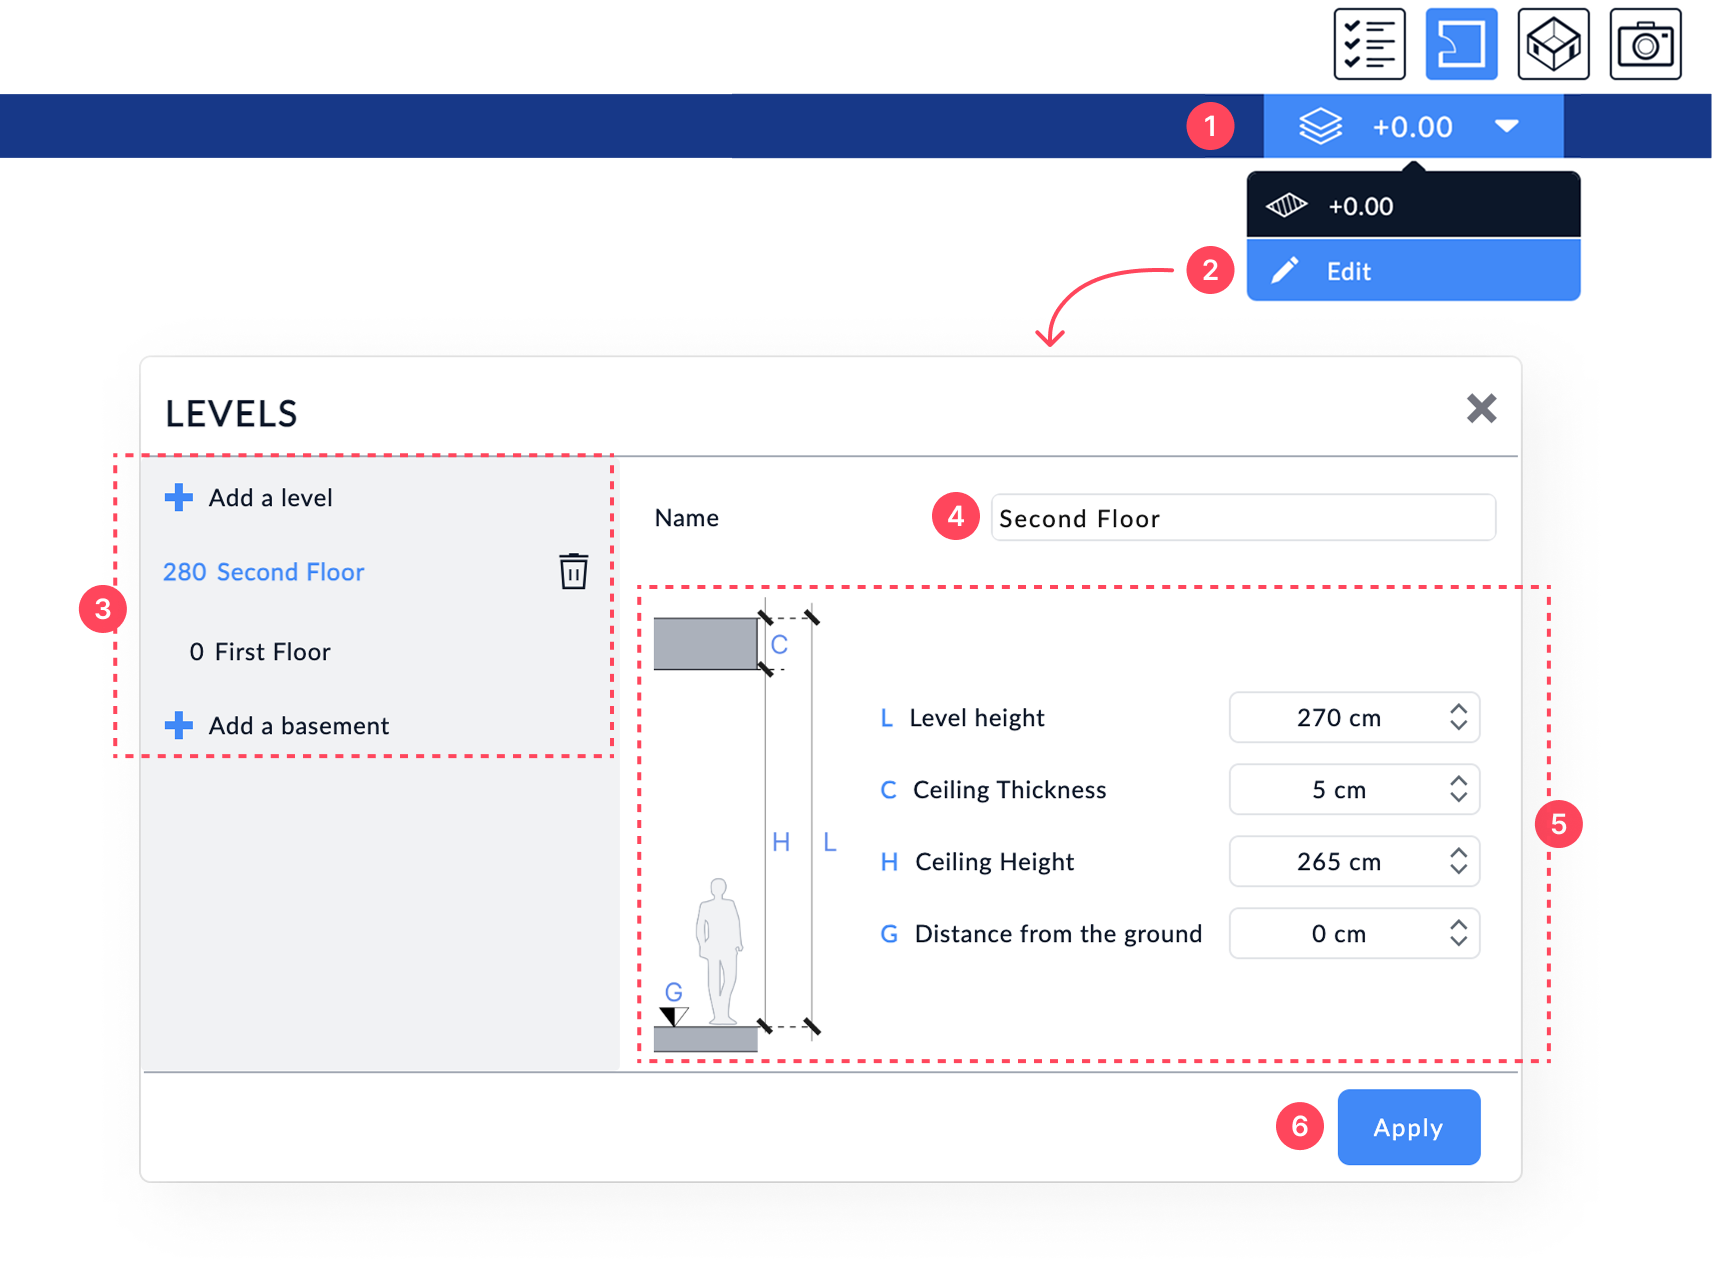
- Click the icon showing stacked levels at the top right of the screen. A dropdown menu will open with the list of existing levels in your project.
- Click Edit to open the level settings window.
- In the left-hand column, you’ll see the list of existing levels (floors or basements), stacked vertically:
- The active level appears in blue.
- To add a level, click + Add a level or + Add a basement.
- To delete a level, click the trash icon next to it.
- Enter the name of the selected level (e.g., “Second Floor”, “Basement”, etc.).
- Adjust the height settings of the selected level:
- L – Level height: Total height between the floor of this level and the floor of the level above.
- C – Ceiling thickness: Thickness of the slab or ceiling separating this level from the one above.
- H – Ceiling height: Height between the floor and ceiling of this level.
- G – Distance from the ground: Vertical offset from the reference ground level.
- Click Apply to confirm your changes.
2. Duplicate a Level
To copy an existing floor plan to another level:
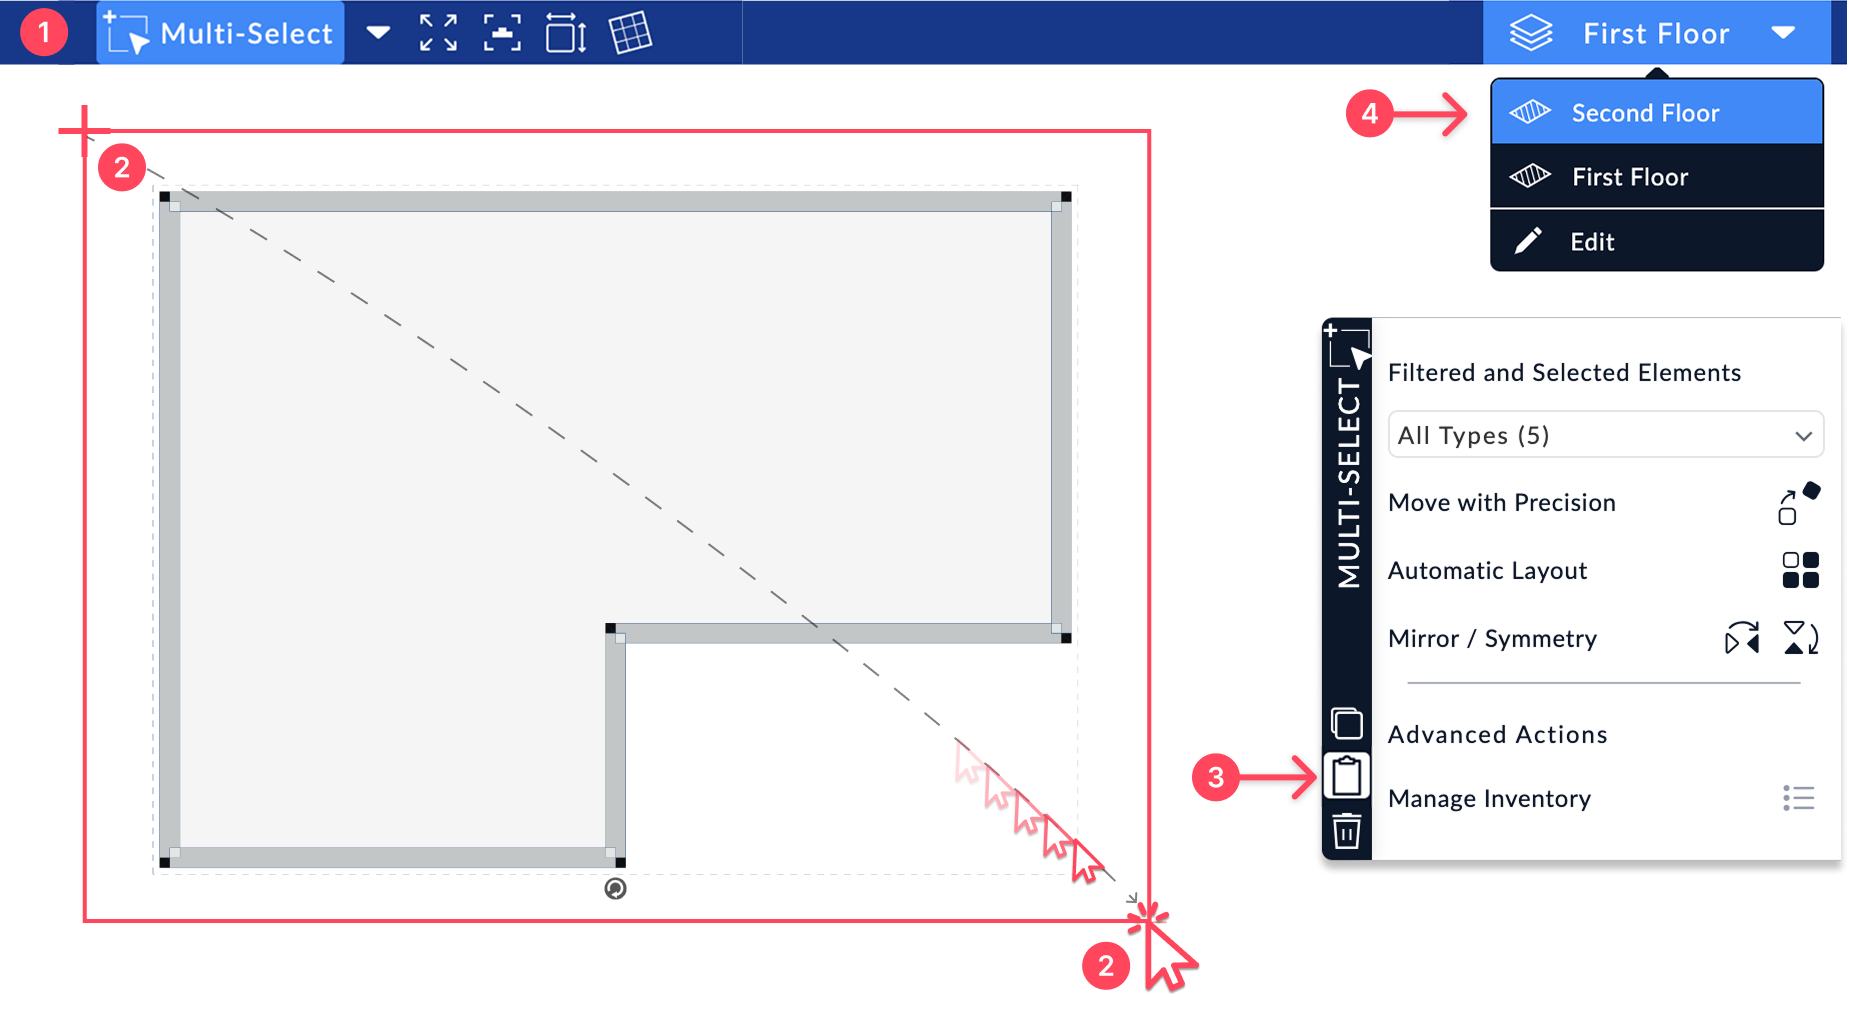
- Activate Multi-Select from the top toolbar.
- Draw a rectangle to select the elements to copy.
Only elements within the selected area and from the active categories will be copied.

- Click Copy to Clipboard in the right panel.
- Switch to the target level, then press
Ctrl+V(for Windows) or⌘+V(for Mac) to paste. - Use the 👁 icon to show or hide lower levels in the list.

3. Draw a Stairwell
A stairwell is an empty space in the slab, allowing for an element such as a staircase, elevator shaft, or duct. To place it correctly, it must be drawn on the level above, where the hole will appear.


Steps to follow:
- Select the Stairwell / Floor Opening tool from the Drawing Tools menu.
- Draw the opening by clicking to place the points that define its outline.
For a clean result in 3D, try placing the points at the center of surrounding walls.
- The opening is automatically created and becomes visible in 3D.
- Display and customize the Name of the opening area using the right-hand panel.
- Display the Area of the floor opening.
- Set the Material that appears on the edge (thickness) of the opening.
Then switch to the lower level to add a staircase or other elements, and preview the result in 3D.
4. Create a Mezzanine
A mezzanine is a partial floor located at mid-height or upper level, open to the space below. To set it up properly, you need to combine a dedicated level with a floor opening.
Steps to follow:
- Add a dedicated level
Create a new level named Mezzanine in the level manager.- Assign it a reduced height if needed (e.g., 160 to 220 cm depending on your design).
- Set its elevation at mid-height above the main floor (e.g., +140 cm if the main floor is +280 cm).
- Draw the mezzanine opening
On this level, use the Stairwell / Floor Opening tool to draw an opening in the floor.- This opening leaves the space empty and lets you see the level below from the mezzanine.
- Place the contour points to match the desired open area.
- Show lower levels if needed
To help position the opening accurately, show lower levels using the 👁 icon in the level selector. - Add stairs, railings, or furniture
Once the mezzanine is in place, you can add specific elements like stairs, low walls, or furniture. The staircase should be added to the level below.